Using SolidSync Trip Tracker
- See the current location information in a simple display.
- Save your GPS location over time during a drive or a run.
- Pause and resume the trip recording: perfect for long trips and/or trips with extended stops.
- Add notes to your trip of noteworthy events.
- View a map of your saved trips from within the application.
- Make a record of GPS data available to any other software that can understand KML files by sharing records.
- Configurable update intervals.
- Runs in the background.
- Export your trip using SolidSync Network/Bluetooth GPS to other applications that can use GPS NMEA data over Bluetooth or TCP/IP, including applications such as ESRI’s ArcGIS, Wireless InSSIDer, and others.
- Tested with applications including Google Earth and others.
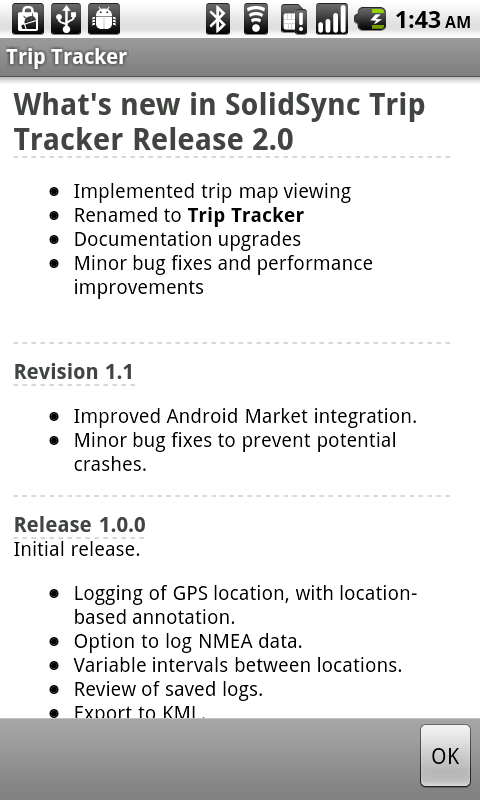
Tap the application icon to start. When the application starts up the first time the release notes will be shown as in Figure 1 below.
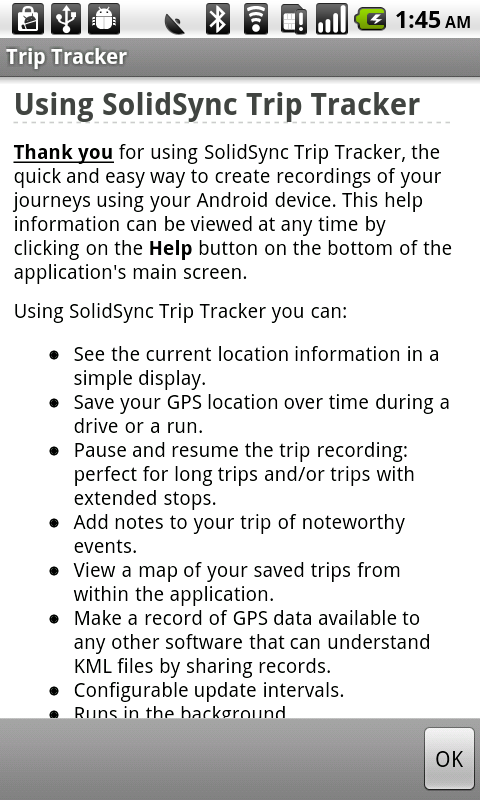
Tap the OK button to show the application help screen, as shown in Figure 2 below. This will be automatically shown the first time the application is started.
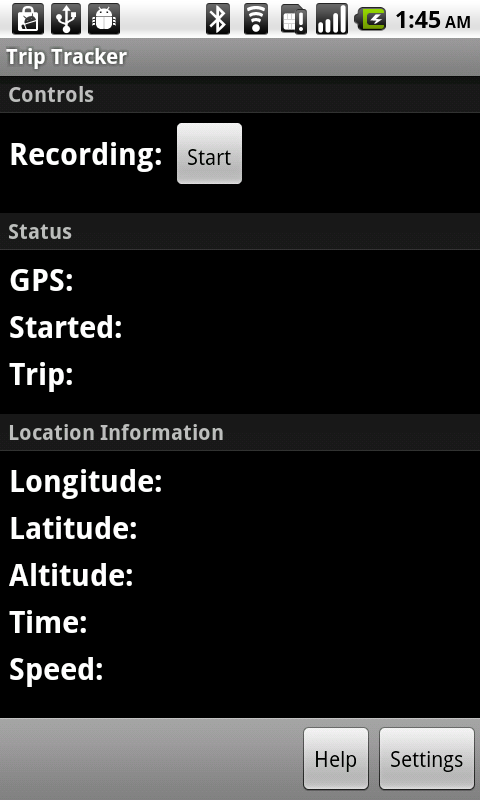
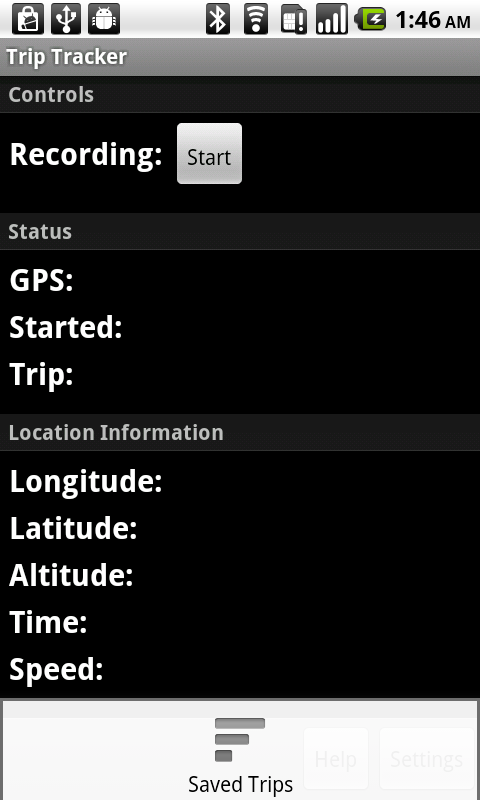
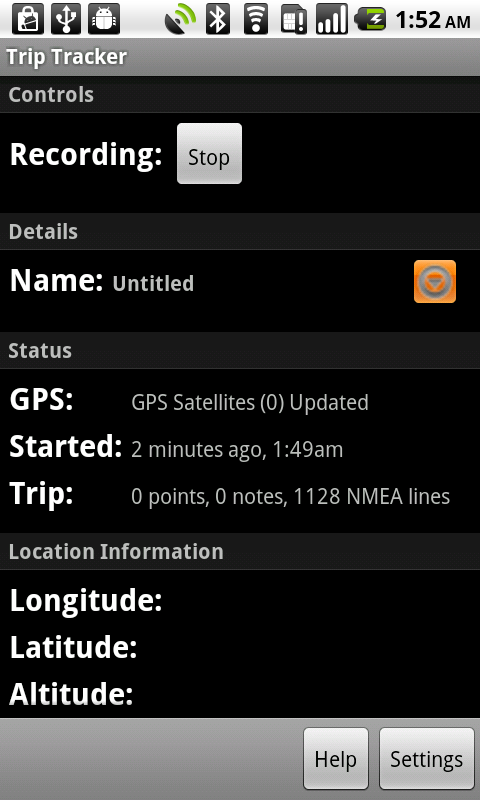
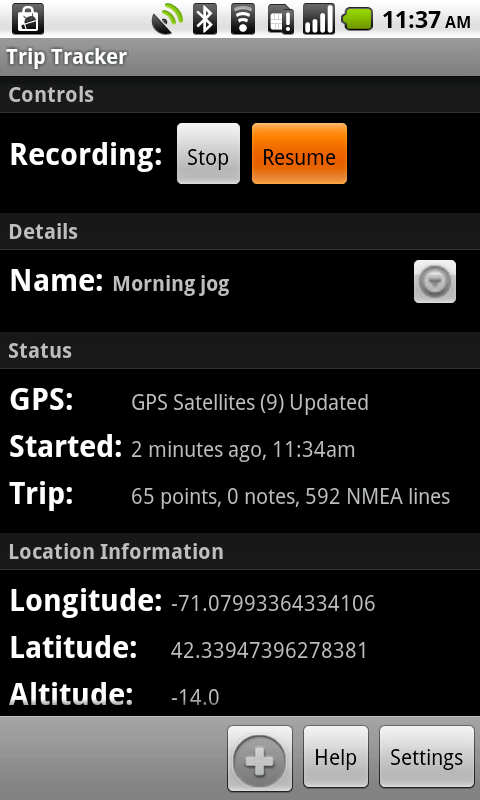
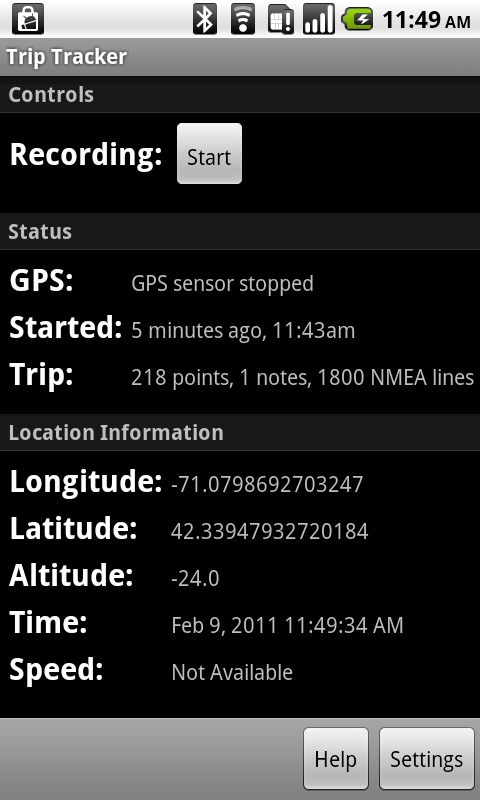
Tap the OK button to show the main application screen as in Figure 3 below: it includes the recording control button, status indicators and location details.
You can tap the Help button to show the help screen (Figure 2 above) at any time.
Tapping the Menu key will show the control menu as in Figure 4 below.
Tap the Recording Start button to start a new trip. If the GPS sensor is disabled, you will be shown the Location and security settings screen as shown in Figure 5 below.
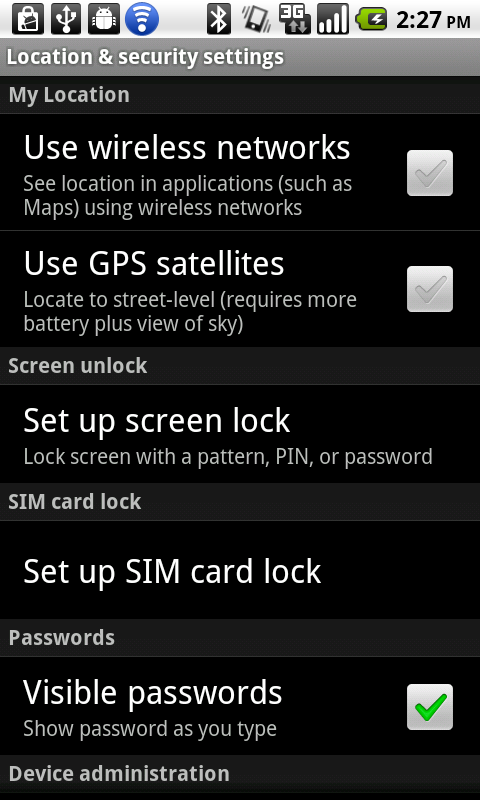
Ensure the GPS sensor is enabled by checking the appropriate item as shown in Figure 6 below.
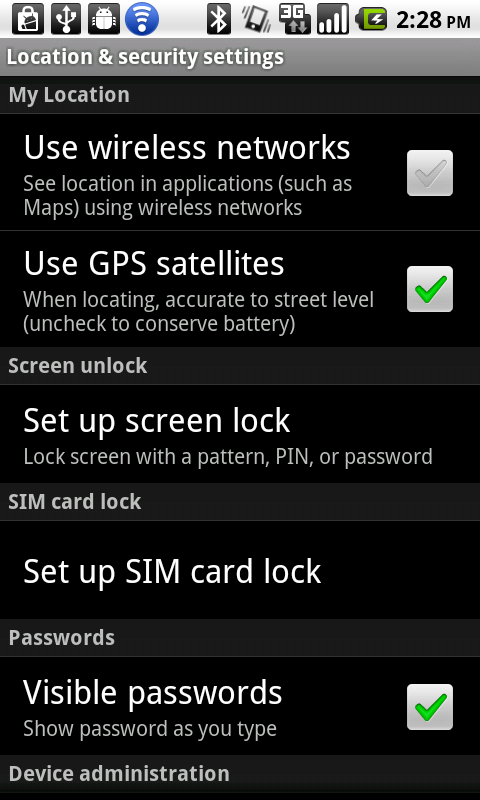
Tap the button to return to the main application screen. If you do not enable the GPS sensor, the service will not be started and an error message will be shown as in Figure 7 below.

If the GPS sensor is enabled then the GPS recording will start immediately, as seen in Figure 8 below.
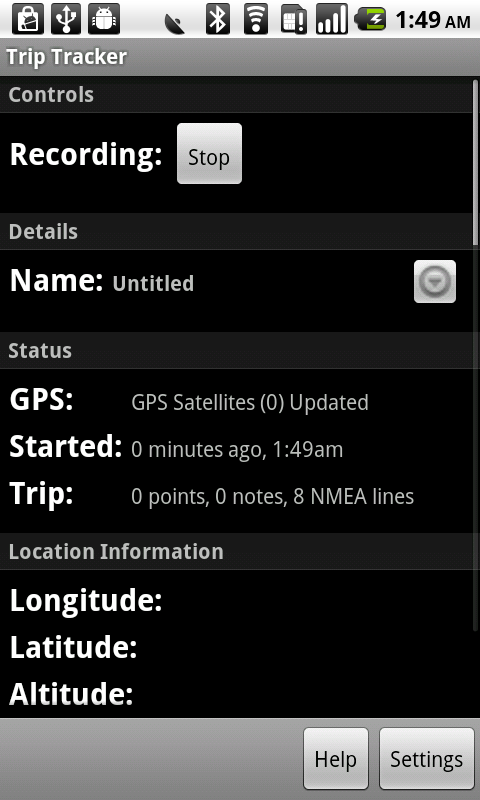
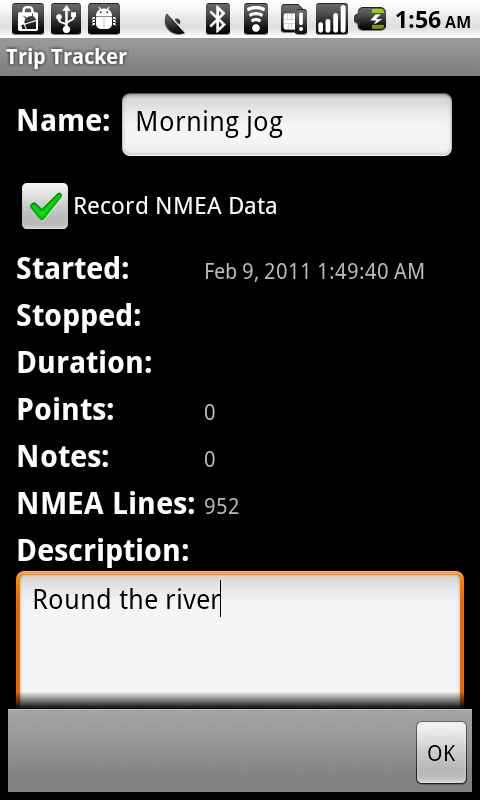
The new trip will be given the name Untitled: you can tap the button to edit the details as shown in Figure 9 below.
The trip details view will let you set a name and a description for the trip as shown in Figure 10 below. You may also disable the option to record NMEA data: this is enabled by default. If you wish to export the data through SolidSync Network/Bluetooth GPS, do not clear this option. If you want to export to KML only, you can uncheck this. Once this setting is cleared it cannot be re-enabled.
Tap OK to save your changes and return to the main application screen. As data is recorded the screen will update to show you the status of the recording. Once a GPS fix is obtained, the location details will be shown as in Figure 11 below.
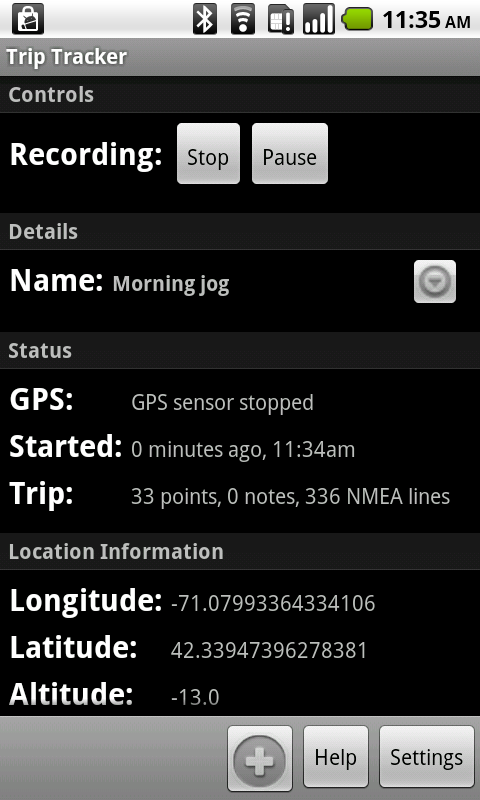
To pause the trip recording, you can tap the Pause button: it will switch the button to Resume, as shown in Figure 12 below.
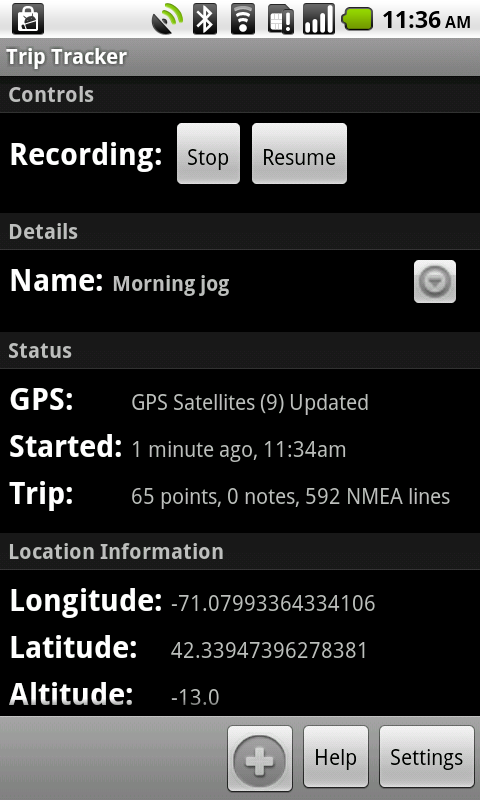
Tap the Resume button to continue recording, as shown in Figure 13 below.
 ) as shown in Figure 14 below.
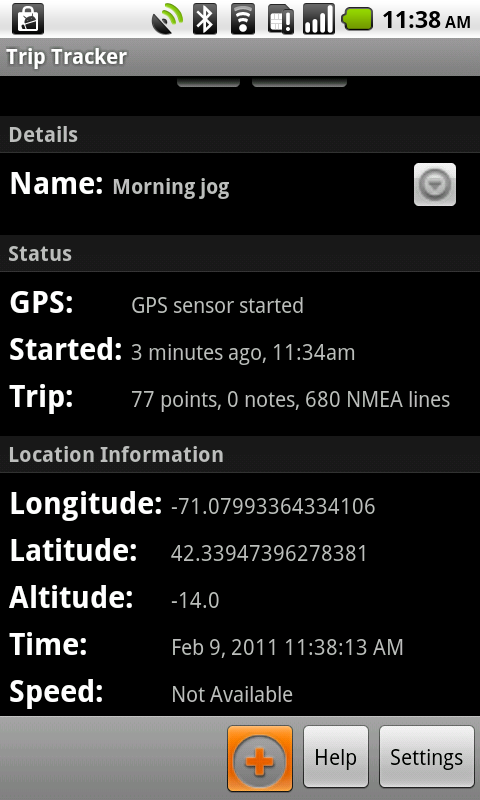
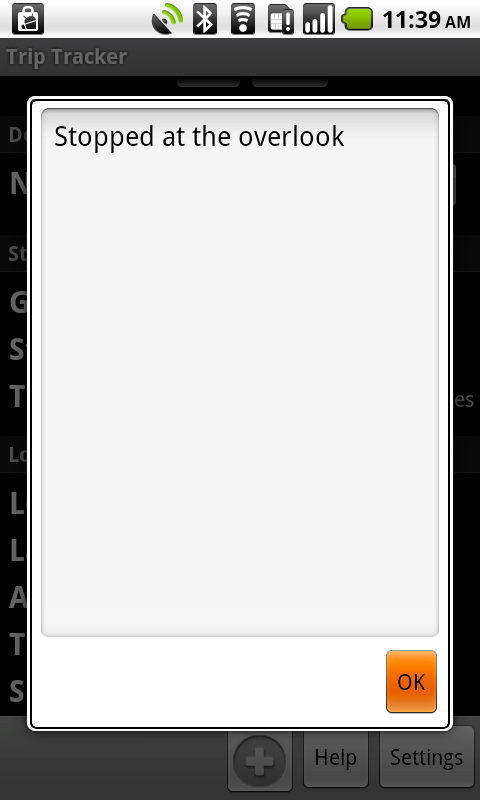
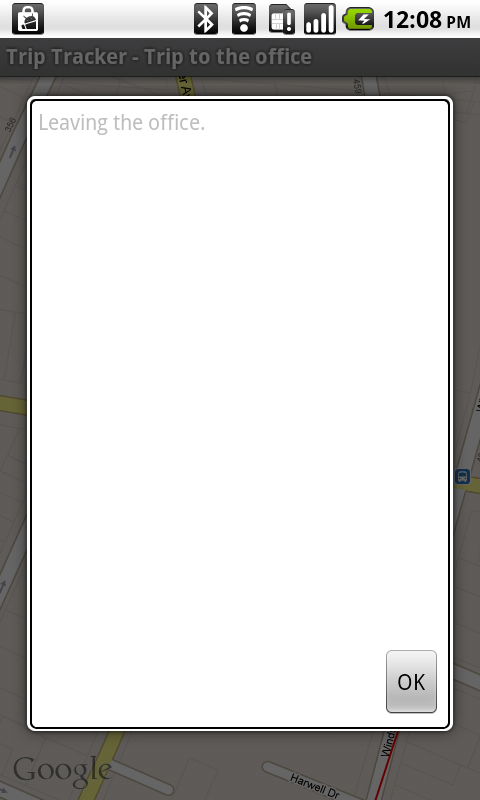
A note entry popup will show as in Figure 15 below.
Type in the note as shown in Figure 16 below and tap the OK button.
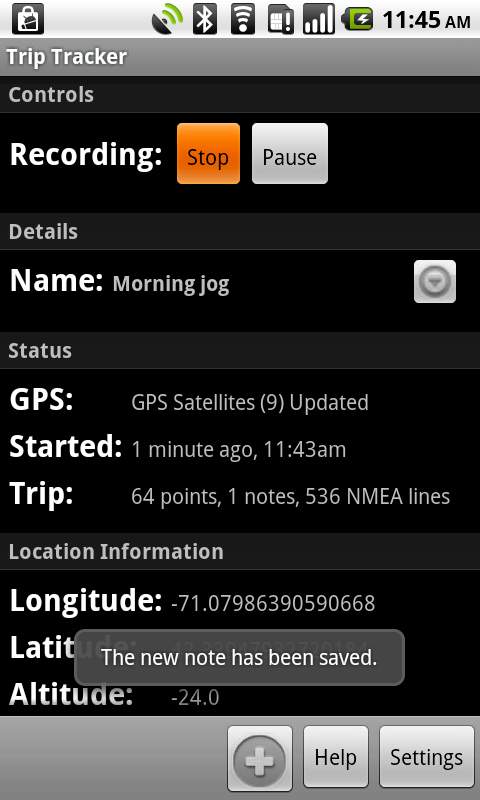
The status will update to indicate the note has been saved as shown in Figure 17 below.
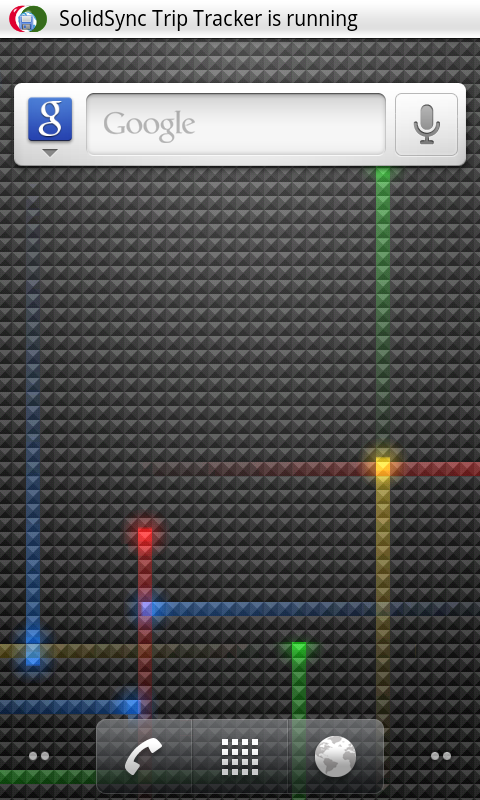
When a recording is taking place and the main application screen is not active (either another app is running or the home screen is visible) a notification will be displayed as shown in Figure 18 below.
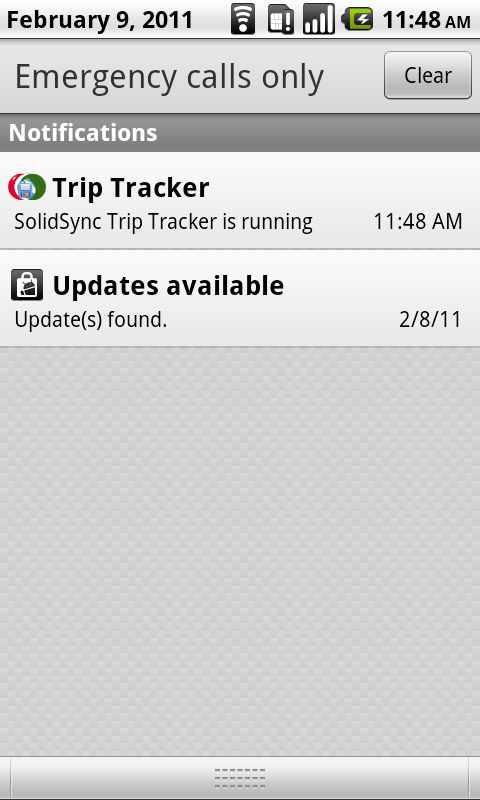
Opening the notification panel shows the indicator that Trip Tracker is running as shown in Figure 19 below.
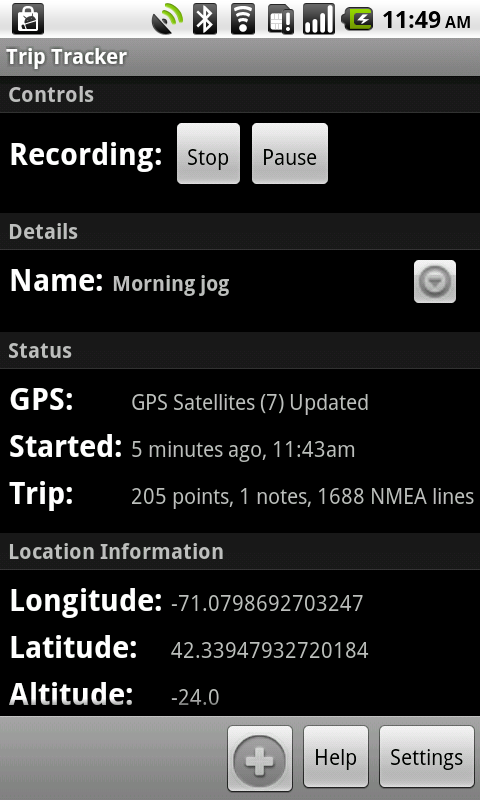
Tapping the notification opens the main application screen, as shown in Figure 20 below.
To stop the trip recording, hit the Stop button. This will stop the recording as shown in Figure 21 below.
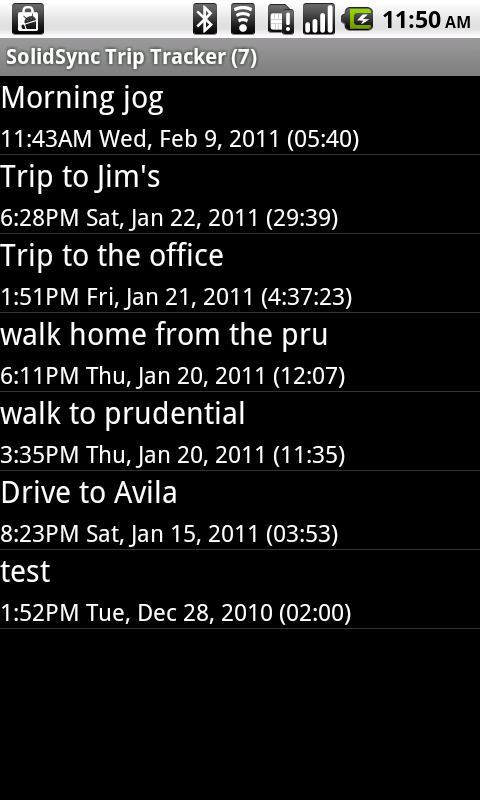
Tap on any trip as shown in Figure 23 below to view it.
This will open the trip’s map view: the trip details will be loaded and then displayed on a map as shown in Figure 24 below.
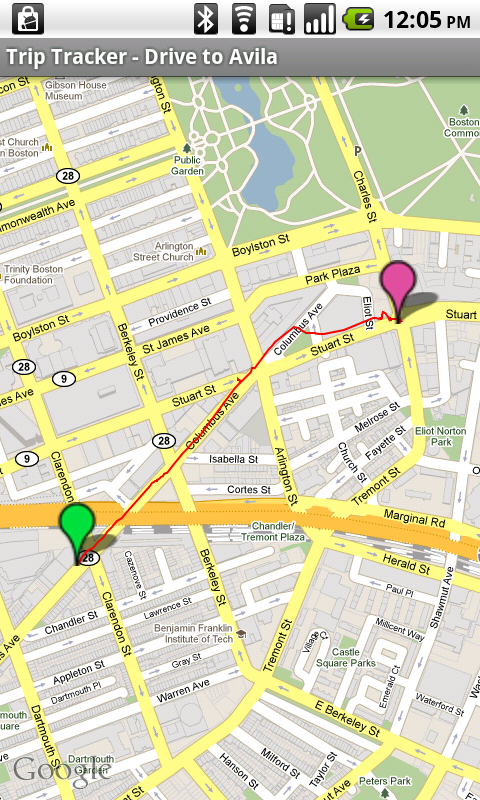
The map will show colored markers for the start and end of the trip: tapping any of the markers will center the map on that marker and show the relevant information for that marker, as seen in Figure 25 below.
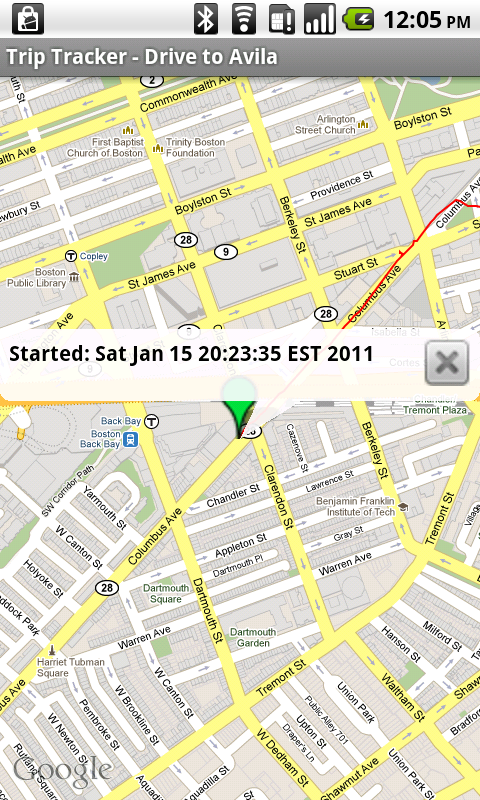
Tapping the Close button ( ) will close the popup. Markers are displayed for pause/resume events, and for each note you record: tapping a note marker will show a summary of the note as seen in Figure 26 below.
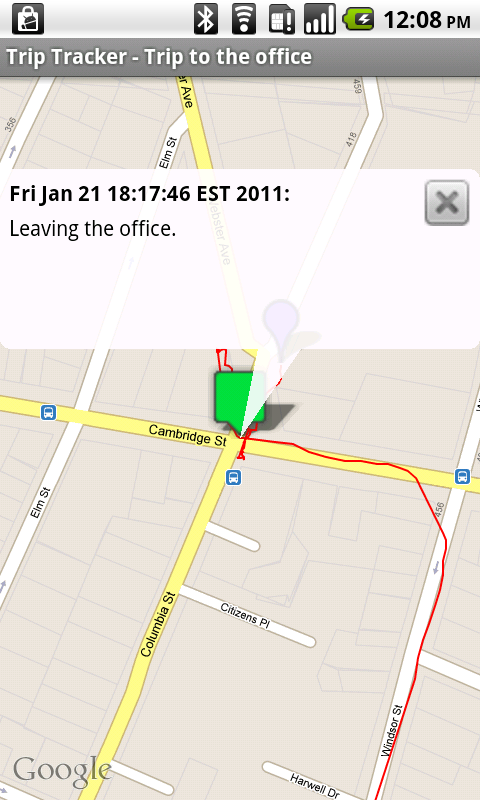
For longer notes, tapping on the next of the note will open up the entire note as shown in Figure 27 below. Tap OK to close the note.
Press the button to return to the trip listing.
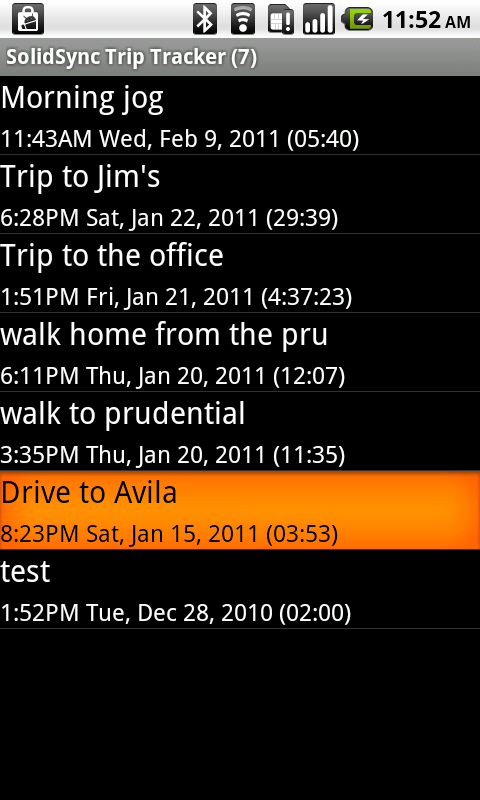
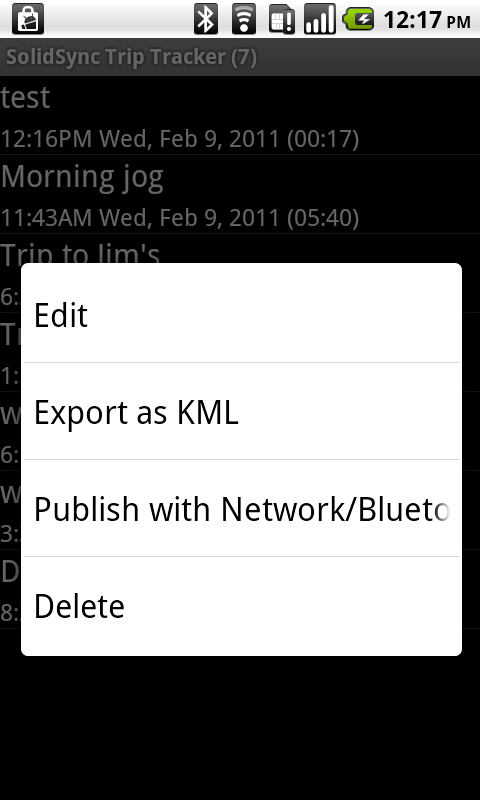
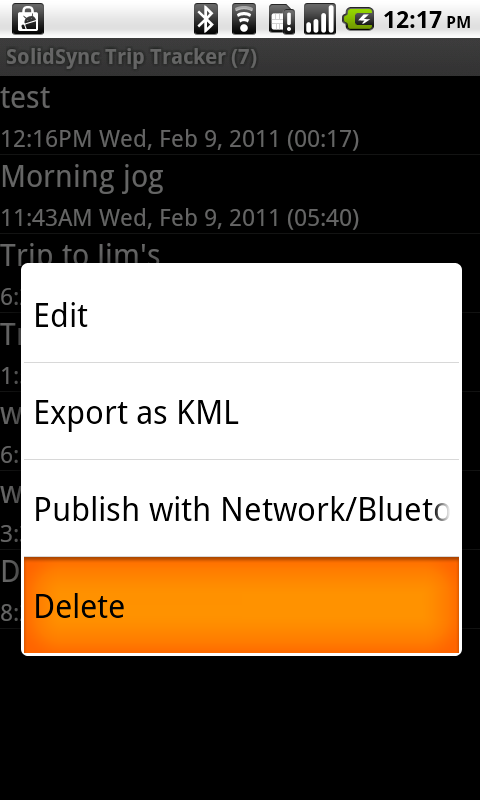
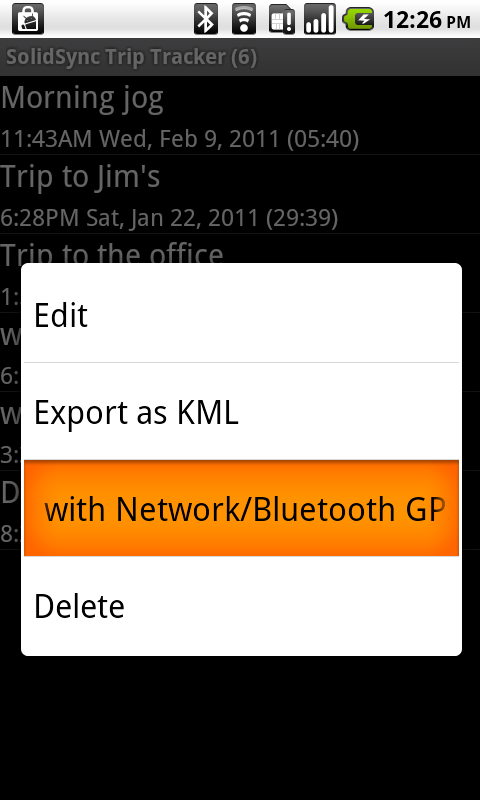
Tap and hold on a trip to open the context menu for that trip: this provides a series of options as shown in Figure 28 below.
To delete a trip, select the Delete context menu item as shown in Figure 29 below.
A confirmation will be displayed, as shown in Figure 30 below.
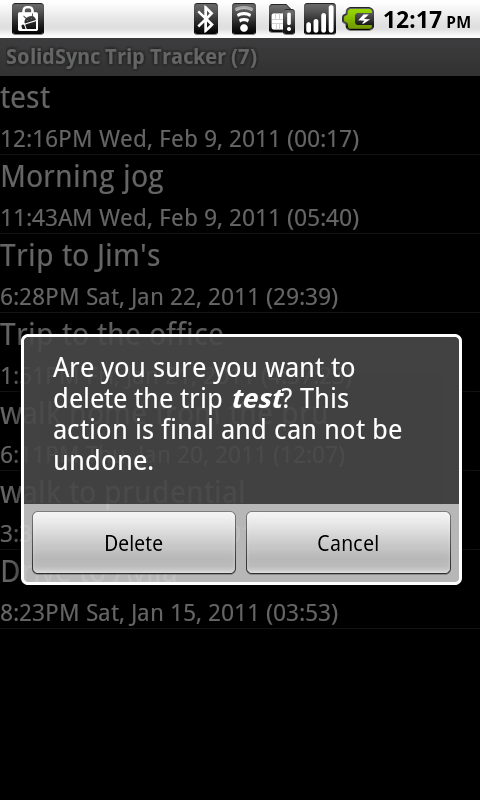
Tap Cancel to cancel the request. Tap Delete to delete the request: the trip will be removed, as shown in Figure 31 below.

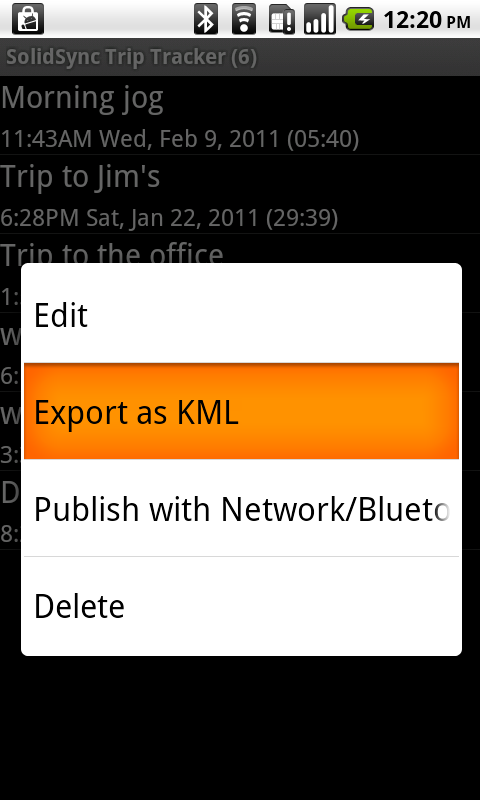
The contents of a log can be exported as a KML (Keyhole Markup Language) file, allowing the file to be displayed/imported by any program that understands KML, including Google Earth and Google Maps. To export a KML file, select the Export KML context menu item as shown in Figure 32 below.
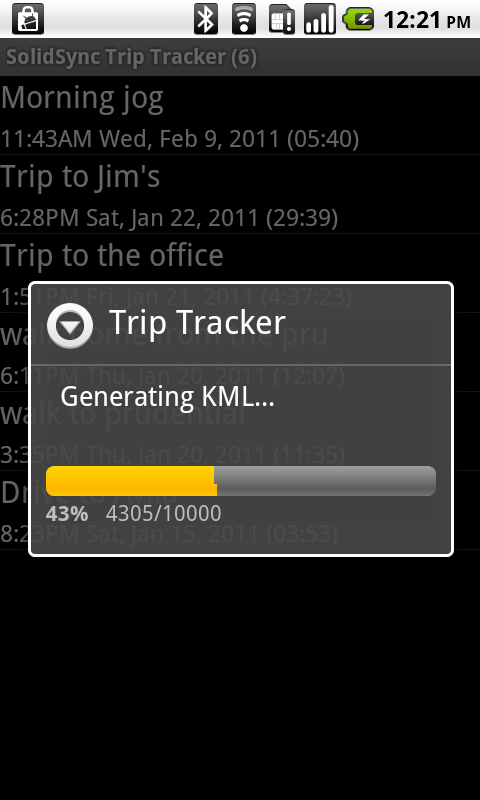
If this is the first time a KML file is being exported for a specific log then a dialog will appear that shows the KML file being generated, as shown in Figure 33 below.
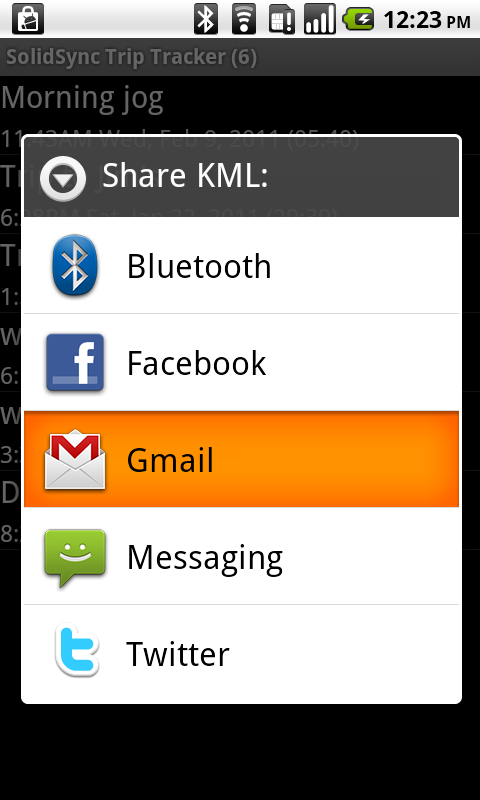
Once the export is complete, the standard Android share menu will be shown as in Figure 34 below, allowing the user to pick the desired sharing method.
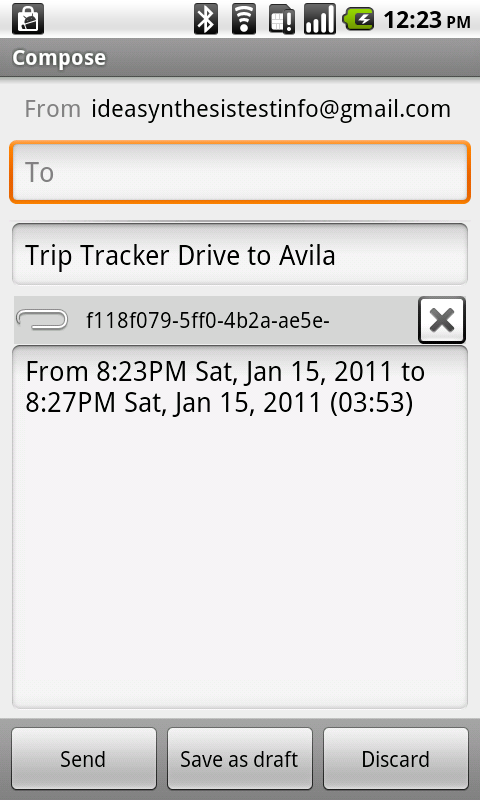
Once the appropriate sharing method is chosen (in this case, GMail), the KML file is passed along as shown in Figure 35 below. You can now enter an email address and send the file.
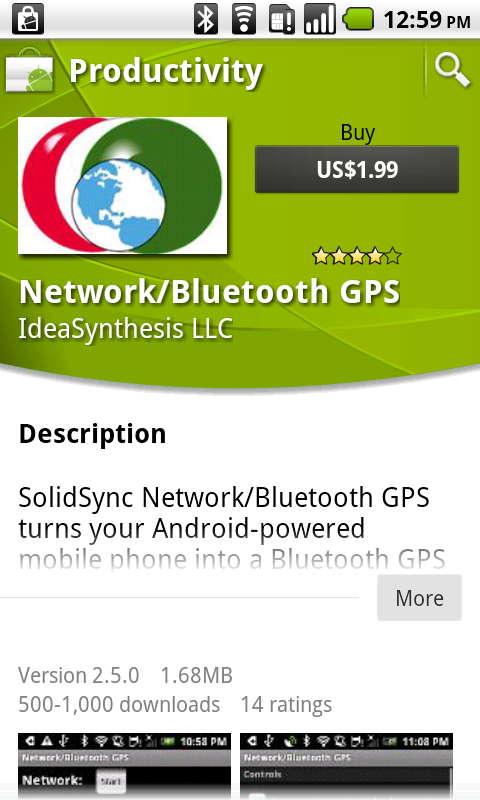
If SolidSync Network/Bluetooth GPS is not installed then the Android Market page for SolidSync Network/Bluetooth GPS will be shown as seen in Figure 37 below.
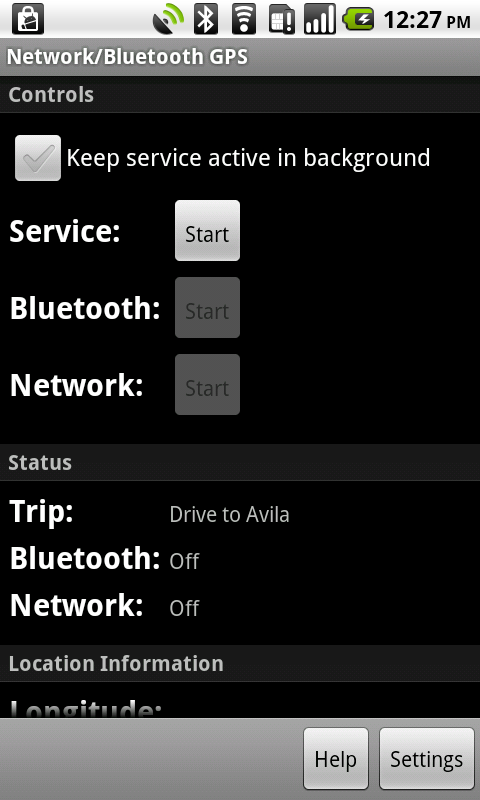
If SolidSync Network/Bluetooth GPS is installed, then the trip will be loaded as shown in Figure 38 below (see the SolidSync Network/Bluetooth GPS documentation for more details).
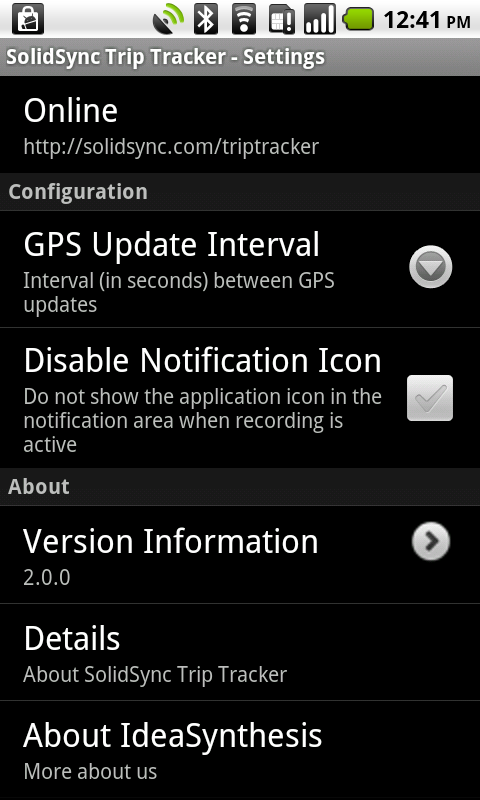
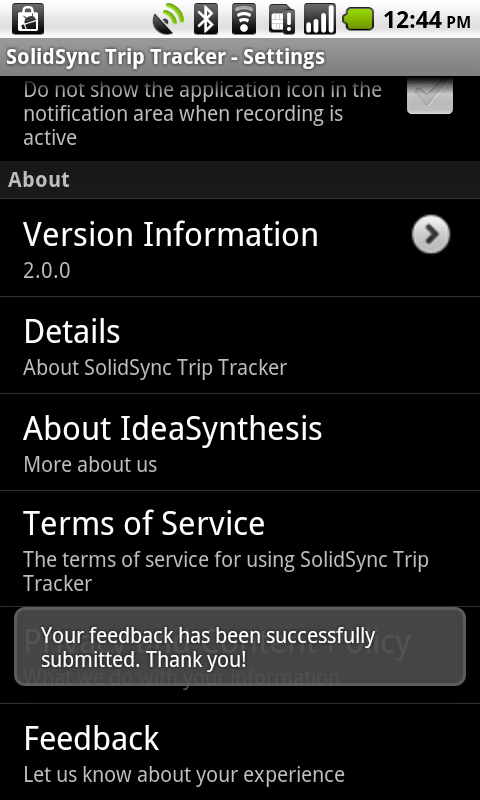
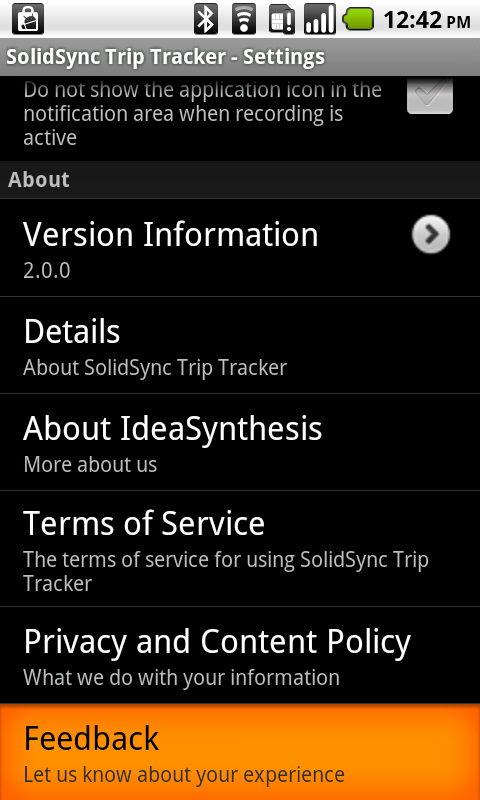
Options are available (you may have to scroll down) to review information about the software, terms of service and the privacy and content policies. You can also adjust the GPS update interval. After making changes to these settings you will need to stop and restart the GPS service.
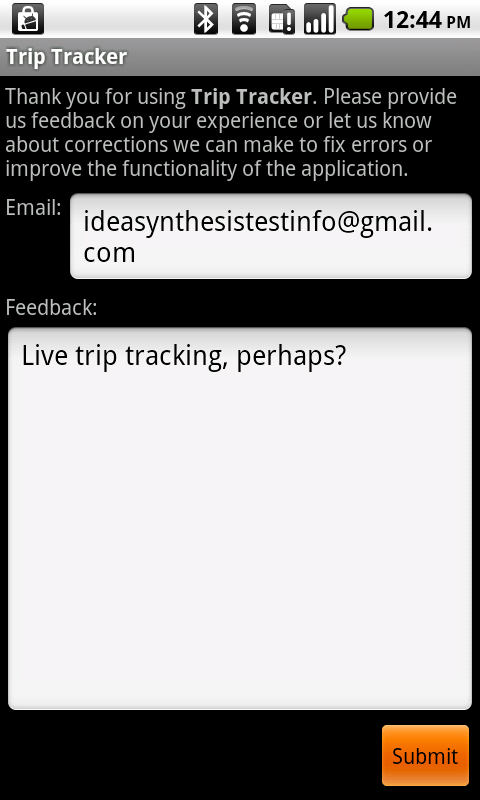
Enter an email address (this is required, so we can get back to you about your requested change) and your comments and press the Submit button as shown in Figure 41 below to send it.
Your submission will be confirmed as shown in Figure 42 below, and that’s it. Thank you!